Poor bone health means our bones become weak, brittle, and porous, thus making them compressible like a sponge. Weak bones increase the chances of developing fractures and breaks. They can be the result of sedentary lifestyles, improper food habits, and lack of care.
There are various diseases like osteoporosis, arthritis, and others that affect the density and strength of our bones. Low calcium levels can also be the cause of weak bones.
Yoga can be helpful in maintaining or strengthening weak bones. Yoga, when combined with a calcium-rich diet, can make a huge difference. Yoga is known to strengthen the bones and joints, as well as the hips, wrists, and spine.
Check out the list of yoga asanas that can help you develop stronger bones over time.
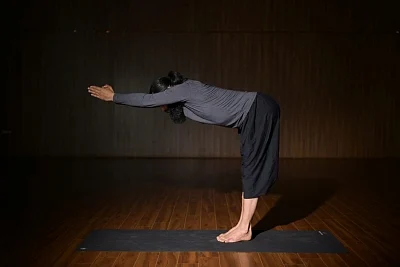
1. Chair Pose
Chair Pose helps improve your balance and improve cardiovascular health, and resilience. It primarily strengthens your core, thighs, and ankles. But it has also proved to be effective to improve posture and neck hump. Here are the steps:
Stand straight with your feet wider than hip-width apart and your arms at the sides.
Inhale and lift your arms to the height of your ears, stretch them straight, and parallel with wrists and fingers long.
Keep your shoulders down and spine neutral.
Exhale while bending your knees, keep your thighs and knees parallel. Lean your torso forward at a right angle with the tops of your thighs.
Keep your neck and head in line with your torso and arms. Hold the pose for 30 seconds to 1 minute.
2. Bridge Pose
The bridge pose helps regulate blood pressure. It calms the brain and alleviates stress. It is beneficial in managing mild depression and is good for abdominal organs, lungs, menstrual pain, fatigue, headache, and anxiety as well.
Lie on your back, place your hands at your sides, bend your knees, and your feet should be flat on the floor close to your butt.
Press into your feet while you lift your hips and torso to create a straight line from your knees to your shoulders.
Hold the pose for up to 30 seconds, then lower your hips to the floor.
3. Cobra pose
This stretches your abdomen, chest, and shoulders. It strengthens your spine and may soothe the sciatica. It helps the hamstrings, gluteus maximus, deltoids, triceps, and serratus anterior muscles. It also helps manage stress.
Follow the steps:
Lie on your stomach and place your hands under your shoulders, with your fingers facing forward.
Draw your arms to your chest, and your elbows should not go out to the side.
Press into your hands and slowly lift your head, chest, and shoulders.
Lift part-way, halfway, or all the way up.
Slightly bend your elbows.
Let your head drop back to deepen the pose.
Release back down to your mat and breathe out.
Bring your arms by your side and rest your head.
Slowly move your hips from side to side to release tension.
4. Tree Pose
This pose will give you a sense of grounding while helping you improve your balance, and strengthen your legs, and back.
If you want to practice the tree pose, follow these steps.
Let your right foot high up on your left thigh. Place the sole of the foot flat and firmly.
Your left leg should be straight while you try to find your balance.
Inhale deeply, and raise your arms over your head while bringing your palms together.
Keep your spine straight and take a few deep breaths.
Slowly exhale while bringing your hands down and releasing your right leg. Back in the standing position, repeat the same with the other leg.
5. Locust Pose
The locust pose improves the posture and is effective in situations of prolonged sitting and computer work. It may help relieve lower back pain and neck pain as well. It can counteract slouching and kyphosis (abnormal curvature of the spine) while strengthening your back muscles, especially the muscles supporting your spine.
Lay on your belly with your feet together and your hands reaching back, your palms should be placed down.
Try extending your big toes straight back and pressing down with all ten toenails to activate your quadriceps.
Rotate your inner thighs to broaden your lower back.
Place your hands on the mat, raise your head, chest, and your legs, leading with your inner thighs.
Roll your shoulders back and up away from the floor. Keep the back of your neck long and try lifting your sternum instead of lifting your chin.
Slowly release if you want to come out of the pose.