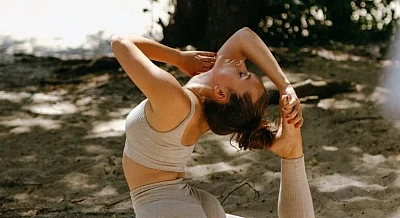
There is no doubt that yoga can solve more than enough of our problems when it comes to our health. Yoga can be a beneficial addition to your osteoporosis treatment. It may help ease symptoms, improve bone health, and lower your risk of complications. Yoga may also help increase bone density after menopause.
It is advised to practice gentle yoga, including weight-bearing poses, to build strength, ease pain, and encourage good posture. It also helps improve flexibility, stability, and agility. Daily yoga practice can improve coordination and reduce the risk of falling.
Here are the five yoga poses you can easily try at home.
1. Extended Triangle
This is a classic standing posture that may not require a yoga mat. It may help alleviate backache, sciatica, and neck pain. It helps relax your spine, hips, and groin while strengthening your shoulders, chest, and legs. It may also help manage stress and anxiety.
This pose focuses on muscles like latissimus dorsi, internal oblique, gluteus maximus, and medius, hamstrings, and quadriceps.
Stand straight, place your feet about four feet apart.
Your right toes should face forward, and your left toes should be spread out at an angle.
Lift your arms parallel to the floor and place your palms downward.
Tilt slightly forward and hinge your right hip to come forward with your arm and torso.
Bring your hand to your leg, a yoga block, or onto the floor.
Now slowly extend your left arm towards the ceiling.
Look up, forward, or down.
Repeat the pose on both sides and hold it for a minute.
2. Cat Cow Pose
This yoga pose focuses on various muscle groups like erector spinae, rectus abdominis, triceps, serratus anterior, and gluteus maximus.
You can follow these steps:
Go on all fours.
Your wrists go underneath your shoulders, and your knees will be placed underneath your hips.
Make sure you balance your weight evenly on all fours.
Breathe in and look up, let your stomach drop down toward the mat.
Breathe out and tuck your chin into your chest, draw your navel toward your spine, and your spine should be arched towards the ceiling.
Maintain focus while you practice this pose.
Focus on releasing the tension in your body.
Hold the pose for at least one minute.
3. Downward Facing Dog
This is one of the traditional yoga poses in which you bend forward. It can be restful and rejuvenating. This pose can help relieve back pain and sciatica. It helps manage imbalance and improves strength.
The pose focuses on muscles like hamstrings, deltoids, gluteus maximus, triceps, and quadriceps. You should:
Get on all fours.
Your hands should be aligned under your wrists and your knees under your hips.
Press into your hands, tuck your toes, and lift up your knees.
Move your sitting bones slowly up toward the ceiling.
Slightly bend your knees and lengthen your spine and tail bone.
Your heels should be slightly off the ground.
Press firmly into your hands and distribute the weight on both sides of the body.
Pay attention to the position of your hips and shoulders.
Your head should be in line with your upper arms and your chin tucked in slightly.
Hold this pose for at least one minute.
4. Corpse Pose
This is a traditional resting pose and helps relax the entire body without putting pressure on any specific muscle groups. It helps calm the central nervous system, aiding the digestive and immune systems. It might also help manage blood pressure and frequent headaches.
Lie down on your back and open up your arms and legs. Then turn your palms upward.
After you get into this position, relax your whole body and face. Don't try to hold your position; try to feel heavy instead.
Try breathing naturally.
Try staying in this position for as long as you are comfortable.
When you want to come out of the pose, deepen your breath, then start to wiggle your fingers and toes to reawaken your body.
Make sure to do a full-body stretch from hands to feet.
Close your eyes and bring your knees to your chest and roll over to one side. Rest in the foetal position for a few breaths.
Return to a sitting position with the help of your hands.
5. Bridge Pose
The Bridge Pose is an advanced level of resting position which helps strengthen the back, glutes, legs, and ankles. It helps open your chest, and hip flexors while calming the entire body. It may stimulate organs of the abdomen, lungs, and thyroid, and rejuvenate tired legs.
Lie on your back and place your hands at your sides, bend your knees, and your feet should be flat on the floor close to your butt.
Press into your feet while you lift your hips and torso to create a straight line from your knees to your shoulders.
Hold the pose for up to 30 seconds, then lower your hips to the floor.

